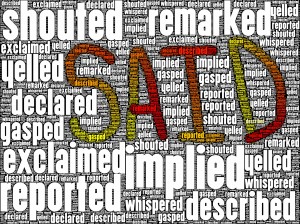
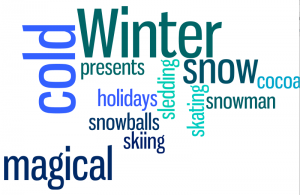
Today you will use KidPix to create a simple drawing of one of the characters in the book Wonder by R.J. Palacio. After you save your picture as a jpg., upload it to Tagxedo and create the word cloud with the character traits that your chosen character possesses.
Tag Archives: ela
Biography Research
About the Author
Today we will create an About the Author page for your stories. Take a picture of yourself using Photobooth. Next open the Word template in the Lessons folder and type in your paragraph.
Poetry Anthology
April is poetry month! You have been learning about the different types of poems and have written some, too. Let’s create an anthology using the iPads and Book Creator. Be creative on how you express yourself and choose elements to enhance the written word. Below is an example of a few different ways to enhance the poems using apps like DoInk, iMovie, Green Screen, My Flake, PicCollage and Drawing Pad.
Original Myths
Vacation Stories
Today we will use the iPads to create our vacation story. We will find our vacation place on the Google Earth app and save a screenshot to include in our book. We will use Drawing Pad app to illustrate pages and also take a picture with the camera of any photos we have brought in. The book will be assembled in Book Creator. We will add our voices and save as an ebook. Below is a sample without voiceovers.
Synonyms
PARCC ELA Practice Test
Today you will take the Grade 3 ELA practice test. Click the link below to get to the test.
Kiva Project
We will begin our Kiva Project by researching information about the country of the entrepreneur from Kiva that you wish to sponsor. Next you will begin to create an i-Movie presentation which will hopefully persuade your classmates to vote for your entrepreneur. Below are the steps to creating your presentation. Use our Kiva wikispace for resources.
1. Research and chose your entrepreneur
2. Storyboard your persuasive writing
3. Collect pictures for your presentation
4. Place pictures on the i-Movie timeline
5. Record your voice and synch with pictures
6. Create a credits page
7. Add transitions
8. Add background music
Paper Circuit Haikus
Today we will start a project which will merge paper circuits and poetry. You have written a haiku about light. First you will illustrate your haiku using a collage method, making decisions about which element of the illustration you wish to illuminate. Once the illustration is complete, you will design a paper circuit using copper tape, LEDs, coin battery and a switch. Once it is designed you will create it on cardstock, which will sit behind your illustration.
Books Are For Reading
Illegal Immigration Persuasive Writing Movie
You have read about the different points of view regarding illegal immigration, and now it is time to choose a side and write a persuasive piece which will be turned into a movie. Once you have finished the writing, you will storyboard it and decide which pictures will be used in which sections. Use the websites below to collect pictures for your movie.
Pixabay
Morguefiles
Wikimedia Commons
Next you will create a movie in iMovie complete with voiceovers and music.
Introduction to Word
We will put your new keyboarding skills to work today by keying in one of your writing prompts. First, we will learn how to put a school heading on your page using the Header portion of Word. We will learn how to Center a title, use the First Line Indent, and Line Spacing to double space. Next week we will learn how to use Spelling and Grammar check and format your fonts. Finally we will learn to add a picture to your document.

Verbs of Steel
Picture a Verb
Let’s make a word come alive! Choose a verb and animate its meaning in Animation-ish. Click the word below to see its meaning.
Book Trailers
You have seen movie trailers from studios which advertise their movies. Now it’s your turn to create a book trailer, in iMovie, for a book you love! We will begin by exploring and watching book trailers created by other students and teachers.
Visit the LiveBinder for examples of Book Trailers by students and teachers and all resources for this project.
Next we will choose a book and write the script for the trailer. Use this Book Trailer Storyboard document to type your script. We’ll search for or take pictures and find music for the trailers using the resources on the LiveBinder. Finally we will use iMovie to put it all together and record the narrative. See my example below.
Consonant Digraphs
Today we will use a template in Kidspiration to help us practice the digraphs th, sh, wh, ch, and ck. Listen to your teacher speak the digraph, then drag the pictures to the correct boxes. Finally, record the word of the object and listen to your recording.
If you are done early use the following links:
sh
th
ch
wh
Inside and Outside Characteristics Graphic Organizer
Today we will use Kidspiration to create a graphic organizer of the inside and outside characteristics of your action figure. Try to include a simile about each characteristic. You will also learn how to use the digital camera to take a picture of your figure to include in your document. Finally you will use the graphic organizer to guide you with writing a paragraph about its characteristics.
Introduction to Word
We will put your new keyboarding skills to work today by keying in one of your writing prompts. First, we will learn how to put a school heading on your page using the Header portion of Word. We will learn how to Center a title, use the First Line Indent, and Line Spacing to double space. Next week we will learn how to use Spelling and Grammar check and format your fonts. Finally we will learn to add a picture to your document.

Acrostic Poem
Raz Kids
Open House Bio Poem Movie
You will use the iPads to create a movie for your parent to view during open house. First type your biopoem in in the app Drawing Pad. Add a few pictures and an attractive font. Next import the saved jpg file into the app iMovie and read the poem to voiceover. Add some music to finish it off.
Letter to Our Pen Pals
YakitKids Animal Poems
Do You Want To Be My Friend?
Today we will begin to work on our class movie based on the book Do You Want To Be My Friend? by Eric Carle. Each student will be either the mouse or one of the animals.
- Read the book in class then decide how the animals might answer the mouse if they could talk.
- Mice-Practice your line, then we will use the green screen to shoot you saying your part. Ms. Mellman will make mouse ears for us.
- Animals- Practice your part, then we will use YakitKids to make the animals talk.
- We will then use the Green Screen app to put it all together.
- Finally, we will bring it into iMovie to add music and sound effect
Alliteration at the Zoo
After studying poetry and figures of speech, specifically alliteration, create an alliteration sentence about an animal you might find in the zoo. Visit the websites below to find a public domain pictures of your animal. Download the picture to the camera role. Next, use the app Yakit Kids to import your picture and then voice over your sentence. All the short movies will be combined into a class movie, Alliteration at the Zoo.
Wikimedia Commons
Pics4Learning
USA.gov
Novel Poetry
My Dream for the World
Today you will key into Word your My Dream For The World paragraph. We will learn how to download a picture from the Microsoft Office website to include in your paragraph and place the picture behind the text.
Wonder Character Traits
Today you will use KidPix to create a simple drawing of one of the characters in the book Wonder by R.J. Palacio. After you save your picture as a jpg., upload it to Tagxedo and create the word cloud with the character traits that your chosen character possesses.
Bravery
Today we will use Google Drive to create a document in your ELA folder. Include a definition of bravery, a list of brave acts, and a sentence or two about a personal act of bravery.
Alien Descriptions
Your aliens are complete and today we will type up your descriptions and share them with our companion class in South Carolina via our Alien Exchange collaborative website.
Retell an Ezra Jack Keats Story with Felt Pad
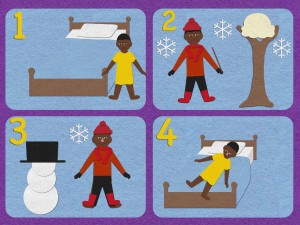
Today we will use the iPads and the app Felt Pad to retell one of the stories of Ezra Jack Keats. Choose the background with four squares and illustrate a beginning, two details, and an ending of the story.
Cloud Haikus
Writing Prompts
We will continue to publishyour writing prompts in Microsoft Word. Spellcheck, change the font and size of your text, and add a picture to your document.
Multicultural Biographies
Today we will begin to create an ebook about the multicultural person you researched. We will use the app Book Creator on the iPads. Gather a few pictures to place inside your book using Wikimedia Commons. Be sure to create a bibliography page at the end of your book for resources and pictures.
Character Word Cloud
Rhyming Families
Boost Your Fluency
Today you will use the iPads to work on your reading fluency. Use Quick Voice to record your reading. Listen to your recording and rate it on the fluency rubric. Repeat the sequence four times, trying to improve your reading.
Raz Kids
Snow Popplet
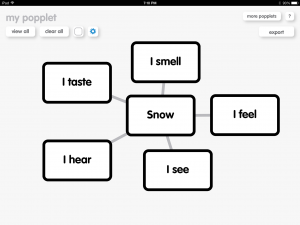
Today we will use the iPads and the app Popplet to create a mind map of how you experience snow with the five senses. Later you will use your map to help you write about snow.
Dream for the World
Snow Cinquain Smashup
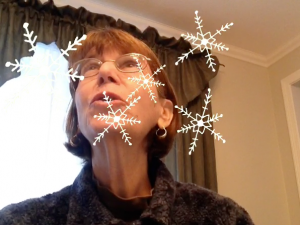
Today we will use the iPads to publish your cinquains about snow. We will create animated snowflakes in Do Ink, type the poem in Drawing Pad, then put them together in Green Screen. Finally, we will voice over the animation in iMovie.
Snow Haiku
Today you will publish your snow haiku on Stationery Studio.
Create your own snowflake at Make-A-Flake!
Snow Haikus
Let’s create a snowflake smashup. Today we will use the iPads to create and animate snowflakes swirling and falling using the app Do Ink. Next you will use the video camera on the iPad to film yourself reciting your haiku. Finally, we will combine the two videos into a movie using the app Green Screen. Click the picture below to watch my example.
Character Word Cloud
Introduction to Word
We will put your new keyboarding skills to work today by keying in one of your writing prompts. First, we will learn how to put a school heading on your page using the Header portion of Word. We will learn how to Center a title, use the First Line Indent, and Line Spacing to double space. Next week we will learn how to use Spelling and Grammar check and format your fonts. Finally we will learn to add a picture to your document.

Introduction to Laptops
We have done a couple of lessons on Microsoft Word in the lab, so let’s finish your writing on the new laptops. We will work in your classroom to learn how to use the laptops and complete our writings.
Tumblebooks
Giraffes Can’t Dance
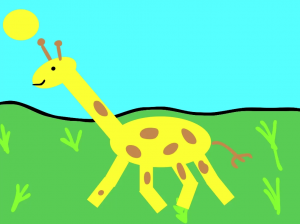
After reading the book Giraffes Can’t Dance by Giles Andred, in Art, you drew a giraffe concentrating on big shapes. You colored the giraffes using yellow or orange then added spots and marks using a brown or black marker, then cut out your creation. Next you created the background, using a double loaded brush technique and an etching technique for the grass. To add a technology component to the project, you will use the animation app Doink to make your giraffe dance. Next we will video you describing what you like about the project. We will create an Augmented Reality trigger from your original artwork. Patrons of the annual Art Show will be able to scan your giraffe to view the animation and video. Click to giraffe below to see the animation.
Kiva Project
We will begin our Kiva Project by researching information about the country of the entrepreneur from Kiva that you wish to sponsor. Next you will begin to create an i-Movie presentation which will hopefully persuade your classmates to vote for your entrepreneur. Below are the steps to creating your presentation. Use our Kiva wikispace for resources.
1. Research and chose your entrepreneur
2. Storyboard your persuasive writing
3. Collect pictures for your presentation
4. Place pictures on the i-Movie timeline
5. Record your voice and synch with pictures
6. Create a credits page
7. Add transitions
8. Add background music
Introduction to Word
We will put your new keyboarding skills to work today by keying in one of your writing prompts. First, we will learn how to put a school heading on your page using the Header portion of Word. We will learn how to Center a title, use the First Line Indent, and Line Spacing to double space. Next week we will learn how to use Spelling and Grammar check and format your fonts. Finally we will learn to add a picture to your document.

Thanksgiving Senses Poem
Verbs of Steel
October Prompt
Today you will begin to key in your October writing prompt in Word. You will save it in the network save folder then learn how to upload it to your ELA shared folder in Google Drive, so you can finish the document at home.
Verb Poem
Guess the Covered Word
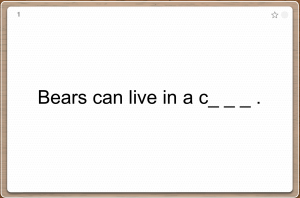
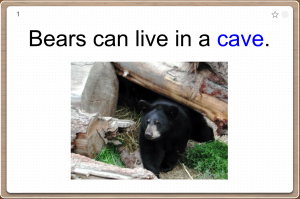
Today will will be working in your classroom with the iPads and the FlashCard+ app. You will work with a partner taking turns reading the sentence and guessing the word. Flip the flashcard to see if you got it right.
I Am Wild!
Wonder Precepts
Explode a Word
Formatting Word Documents
Today you will be keying in a short writing piece. We will review some of the formatting features in Word such as how to create a heading, center a title, indent a paragraph, double-space a document, and spellcheck.
Rhyming Families
Characteristics of a Scarecrow
You have drawn and cut out a scarecrow in your classroom and added much detail to it. Today we will use Kidspiration to create a graphic organizer of the inside and outside characteristics of your scarecrow. Try to include a simile about each characteristic. You will take a picture of your scarecrow to include in your document. Finally you will use the graphic organizer to guide you with writing a paragraph about its characteristics. If you are done early go to the Little Critter’s Scarecrow Game.
Bio Poem
Today we will review some of the formatting features in Microsoft Word, so you can begin to key in your Bio Poem. We’ll review how to set up a heading, Alignment and Spacing, formatting text, and Spellcheck. You also learn how to use Photobooth to take a picture yourself, which can be placed in the poem.
Poetry Anthology
Use Microsoft Word to type in your poems for your anthology.
Deborah Sampson Pargraph
Today you will type your paragraph about the life of Deborah Sampson in Microsoft Word.
Letter To Our Penpals
Paul Revere Acrostic
Powerpoint Book Reports
You have read your book and filled in your storyboard, so today we will set up your Powerpoint slideshow for your book report and populate it with pictures and text.
Tall Tales
Today will type in your Tall Tale project. We will learn how to make columns so that you can create a long tall tale! We will also illustrate your tall tale by creating a picture in Kid Pix.
Skype with British Columbia
Today we will meet our Alien Exchange partners from Bear Creek Elementary in Surrey, British Columbia during a Skype session. Each group will get a chance to comment on the drawings and we will ask several questions of our partners. See the Alien Exchange wiki here.
Biography Powerpoint
Today we will set up your Biography Powerpoint presentation. Download a picture of your person. Include the following information on your slides.
1. Title Page with picture
2. Personal Background- major events in person’s life
3. Personality Traits
4. Significance- Why was this person important
5. Obstacles
6. Important Quote
7. Credits
We will use the iPads and the app FaceTalk to creatae your person speaking the quote. We will then insert the movie into the quote slide. Click to see my example below.
https://heightstechnology.edublogs.org/files/2013/03/IMG_0133-12afg17.mov
Transliteracy: Van Gogh’s Chairs and QR codes
Based on a project by Sylvia Tolisano we will be working on an art, ELA, and technology project over then next few weeks.
- After learning about Van Gogh’s chairs, from Mrs. Mellman in Art, you drew a chair that represented you and things important to you
- Next you will write a script with Mrs. Hanley describing your chairs and the choices you made
- We will type the script in Microsoft Word
- Then we will use Garageband to podcast the script
- Finally, we will create a QR code which will be posted on your picture at the Art Show for all to see and listen to
About the Author
Today you will key in your About the Author paragraphs in Microsoft Word for the Author’s Breakfast. You will learn how to take a picture of yourself in Photobooth and insert it into your author blurb.
Flat Stanley in Maryland
Today we will be meeting in your room to learn about our companion class from Triadelphia Elementary School in Maryland and to write a letter on the wiki introducing ourselves to them. Next we’ll dress (decorate) our Flat Stanley in Massachusetts garb and send him on his way. We’ll be following his adventures at our Flat Stanley Wikispace. When the Maryland Flat Stanley arrives we will take him all over Sharon and record his adventures in Sharon.
Gallery of the Gods
Use the website below to learn about Roman Gods and Goddesses. You will be writing a short script introducing your god and describing his myth. Download a picture of your god, too. We will use Face Talk on the iPads to record your information and collect them all into a God Gallery. Click the picture of Cupid to see my sample.
Alien Descriptions
Today you will type in your Alien descriptions into Word so we can post them on our Alien Exchange website. Now the fun begins as our Hawaiian friends try to redraw our Aliens from our descriptions and vice versa!
Letter to Jan Brett
Writing Prompt
Today we will review setting up a heading in Microsoft Word, centering, first line indent, and line spacing. Key in your writing prompt and next week we will learn how to use the spellcheck, format fonts, and add a pictures.
My Dream for the World
Today you will key into Word your My Dream For The World paragraph. We will learn how to download a picture from the Microsoft Office website to include in your paragraph and place the picture behind the text.
Winter Cinquain
Today you will type in your winter cinquain into Word. Then create a snowflake at Make-A-Flake to add to your poem.
Writing Prompt
Today you will key into Word your writing prompt. Use a proper heading in the header area, center a title, indent your paragraph, spellcheck, format your font, and add a picture to your work.
My Dream For The World
Snow Haikus
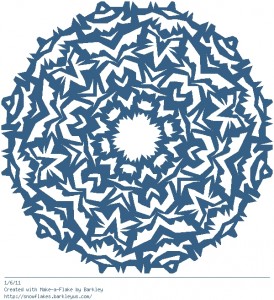
Today you will key your snow poem into Microsoft Word. Put a school heading on your page using the Header portion of Word, center a title, use the spelling and grammar check, and edit the font. You will create a snowflake at Make-A-Flake and insert it into your poem, as a picture behind the text.
Snow Haiku
Today you will publish your snow haiku on Stationery Studio.
Create your own snowflake at Make-A-Flake!
Snowglobe Writing
Family Traditions
Today you will publish a second writing piece in MicroSoft Word. Key in your family traditions paragraph, spell checking and formatting the document. Add a picture and border to your work.
Hopes and Dreams
Today you will key your Hopes and Dreams paragraph into Microsoft Word.When you complete your paragraph use the Wordle website to create a word cloud.
Persuasive Writing
Today you will use Microsoft Word to write your persuasive writing assignment.
Thanksgiving Senses Poem
Introduction to Word
We will put your new keyboarding skills to work today by keying in one of your writing prompts. First, we will learn how to put a school heading on your page using the Header portion of Word. We will learn how to Center a title, use the First Line Indent, and Line Spacing to double space. Next week we will learn how to use Spelling and Grammar check and format your fonts. Finally we will learn to add a picture to your document.

Fall Poem
Use Microsoft Word to publish your Fall poem. Add a picture and a border around your page.
Pumpkin, Pumpkin
Cloud Haikus
Verbs of Steel
Bio Poem
Today we will review some of the formatting features in Microsoft Word, so you can begin to key in your Bio Poem. We’ll review how to set up a heading, Alignment and Spacing, formatting text, and Spellcheck. You also learn how to use Photobooth to take a picture yourself, which can be placed in the poem.
Hopes and Dreams For the Coming Year
Today you will key in your writing piece on your hopes and dreams for the coming school year in Microsoft Word. We will review how to use header and footer, tabs, alignment and spacing, first line indent and spelling and grammar check.

Letter to a Fourth Grade Student
Today you will key into Word your letter to a future fifth grade students, explaining what they can expect next year.
Letter To My Fifth Grade Teacher
Today you will key into Word your letter to your next year’s fifth grade teacher.
Author’s Breakfast Writings
We will continue to edit our writing pieces over the next two weeks to get ready for the Author’s Breakfast.
Tall Tales
Today will type in your Tall Tale project. We will learn how to make columns so that you can create a long tall tale! We will also illustrate your tall tale by creating a picture in Kid Pix.
Digital Poetry Anthology
Today you will use Powerpoint to compile the poetry which you have written this year into a digital anthology. Use one slide per poem, including the type of poetry it represents in the heading. Create a slide for the title page and an About The Author slide. Choose a background that goes well with each slide, and be creative with your presentation. Also, the slide show should advance on a click with the same transition between each slide. Record yourself reading the poem with the build in record sound feature in Powerpoint.
Letter To Our Penpals
Transliteracy: Van Gogh’s Chairs and QR Codes
Based on a project by Sylvia Tolisano we will be working on an art, ELA, and technology project over then next few weeks.
- After learning about Van Gogh’s chairs, from Mrs. Mellman in Art, you drew a chair that represented you and things important to you
- Next you will write a script with Mrs. Hanley describing your chairs and the choices you made
- We will type the script in Microsoft Word
- Then we will use Garageband to podcast the script
- Finally, we will create a QR code which will be posted on your picture at the Art Show for all to see and listen to
Paul Revere Acrostic
Letter To Our Penpals
The Giving Tree Critique
Poetry Glog
Today you will create a Glog, at Glogster EDU, of the poem you chose to read and interpret . You can download a public domain image of the poet at Wikimedia Commons. Include the following information on the Glog:
- Name of Poet
- Country of Origin (i.e. American Poet, English Poet, etc.)
- Birth and Death
- Type poem if possible, if copyrighted still create a link to the poem
- Any unknown or tricky vocabulary and what it means
- Use of figurative language
- Interpretation of poem
My Special Person
Today you will key into Word your Special Person writing prompt. Place a heading in the header, center a title, and indent the first line of your paragraph. Double space your work and run a spell check. Change the font and size and add a picture to your document.
My Dream For The World
Today you will key into Word your My Dream For The World paragraph. We will learn how to download a picture from the Microsoft Office website to include in your paragraph and place the picture behind the text.
Contractions
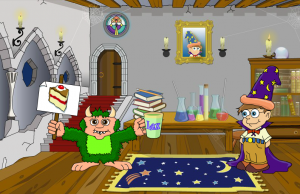
Help Grizzle the monster match the words to make contractions. We’ll start by playing this interactive activity at the board (click picture below). Then, at your computer, you’ll practice making contractions by going to the Connie’s Contractions activity in Kidspiration. If you have time, you can practice more online with Contraction Match or Contraction Basketball.
My Special Person
Today you will key into Word your Special Person writing prompt. Place a heading in the header, center a title, and indent the first line of your paragraph. Double space your work and run a spell check. Change the font and size and add a picture to your document.
Snowman Exchange
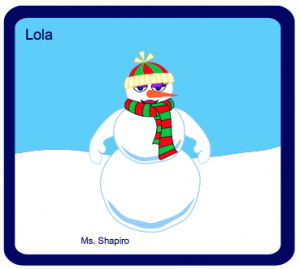
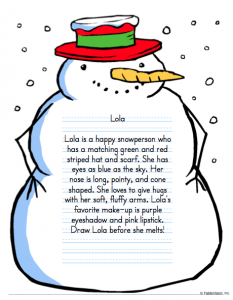
Build a snowman, type a description, and see if a student from Mrs. Shea’s class at Cottage Street School class can re-create your snowman based upon the description you wrote. First, build your snowman using the Virtual Snowman Builder. You can choose any of the parts except for extras. Give your snowman a name and include your own name underneath. Print a copy.
Next, use Stationary Studio to type your description. Use the snowman template under Holidays & Seasons. Have a teacher check, save, then print.
Once finished, you will exchange your snowman with a student from Mrs. Shea’s class and see how accurately he/she can re-create it. You will recreate their drawing from his/her description.
Persuasive Writing
Today you will use Microsoft Word to key in your persuasive writing piece. Place a heading on your page, center your title and indent your paragraph. Double space and spellcheck your work.
Winter Cinquain
Today you will type in your winter cinquain into Word. Then create a snowflake at Make-A-Flake to add to your poem.
Snow Poems
Today you will key your snow poem into Microsoft Word. Put a school heading on your page using the Header portion of Word, center a title, use the spelling and grammar check, and edit the font. You will create a snowflake at Make-A-Flake and insert it into your poem, as a picture behind the text.
Compound Words
Grizzle is trying to help the wizard understand what he wants. Let’s see if the wizard can figure out his request. We’ll start by playing this interactive activity at the board (click picture below). Then, at your computer, you’ll practice compound words by going to the Polly’s Playground activity in Kidspiration. If you have time, you can then practice rhyming words with Cat at Bat or Rhyming Rhinos.
Vacation Voicethread
Today you will use Kidpix to illustrate your story about your vacation week. We will record the stories in a Voicethread and publish them on the Internet.
Famous Inventor Magazine Cover
Today you will use Big Huge Labs to create a magazine cover of the famous inventor which you chose for your book report. Find a picture of the person at Wikimedia Commons and download it into your documents folder. Then compile the information on a magazine cover.
Ruby Bridges Prompt
Today you will use Microsoft Word to key in your Ruby Bridges writing prompt.
Spelling City
Head to Spelling City to type your trick words for this week. Then try out a few games (there are 5 to choose from). When you think you’re ready, you can take the spelling test.
Winter Paragraph
Today you will publish your winter paragraph in Microsoft Word. We will create a snowflake at Snowdays and add it to your paragraph. Click on the snowflake below to create your snowflake.
Winter Wordle
Today you will create a Word cloud using Wordle. First open word and brainstorm words that make you think of winter. Next we will use Wordle and copy and paste your ideas to create and customize the cloud. In the classroom you will write a paragraph about winter activities.
Snow Poems
Best Birthday Prompt
Today you will put your newly acquired keyboarding skills to work. We will learn how to use Microsoft Word to key in your Best Birthday writing prompt. You will learn how to place a heading on your page, center a title, indent a paragraph, edit the font, spell and grammar check as well as insert a picture.
Thanksgiving Writing
Today you will put your newly acquired keyboarding skills to work! I will introduce Microsoft Word so that you can publish your paragraphs. You will learn how to use the Header, Alignment and Spacing, First Line Indent, Spelling and Grammar check, and how to format the font. Next week we will learn how to download and add a picture from the Microsoft website and print our finished work.
An Important Person in My Life
Today you will put your newly acquired keyboarding skills to work! I will introduce Microsoft Word 2011 so that you can publish your paragraphs. You will learn how to use the Header, Alignment and Spacing, First Line Indent, Spelling and Grammar check, and how to format the font. Next week we will learn how to download and add a picture from the Microsoft website, add a border, and print our finished work.
Monster Project Reflections
The Gallery for the Monster Project is complete! Today you and your partner will examine the dfferences between the original pictures and the redraws. Use the Reflection document to record what you could have done better to help your companion group be more successful in creating your original drawing. We will be Skyping with Ms. Martin’s class in Tatamagouche, Nova Scotia next week to discuss our reflections on the project.
Thanksgiving Senses Poem
Nouns and Verbs
Today you will key in your reading response into Word. Place a heading and title on the page. Use the highlighter tool to highlight the nouns and verbs. Use a different color for each.
Best Birthday Prompt
Today you will put your newly acquired keyboarding skills to work. We will learn how to use Microsoft Word to key in your Best Birthday writing prompt. You will learn how to place a heading on your page, center a title, indent a paragraph, edit the font, spell and grammar check as well as insert a picture.
Town Crier Voicethread
Writing Prompt
Today you will use Word to key in your writing prompt. Put a heading on your page, center the title, add a picture and border to the document.
Verbs of Steel
Time Capsule Letter
Today we will work on the Time Capsule Project. We will review some formatting and editing tools in the new Microsoft Word 2011. We will learn how to set a tab, indent a paragraph, format the font, add a border, and use the spelling and grammar check. Next, we will learn how to take a picture of ourselves using Photobooth and how to add the picture to your document.
Word 2011
Bio Poem
Today we will review some of the formatting features in Microsoft Word, so you can begin to key in your Bio Poem. We’ll review how to set up a heading, Alignment and Spacing, formatting text, and Spellcheck. You also learn how to use Photobooth to take a picture yourself, which can be placed in the poem.
Hopes and Dreams for the Coming Year
Today you will key in your writing piece on your hopes and dreams for the coming school year in the new Microsoft Word. We will review how to use header and footer, tabs, alignment and spacing, first line indent and spelling and grammar check.

International Dot Day
Today is International Dot Day! We will listen to author and illustrator Peter Reynold’s read his book, The Dot, and then we will head to our computers to “Make Our Mark” with Kidpix.
Citizenship
Digital Storytelling: The Hand-Me-Down Project
We will begin to get organized for the big Hand-Me-Down Story Project. You have completed the first step of interviewing your family members to gather information about a story that is often retold at family events. The next steps include:
- Use Inspiration software to create a graphic organizer that will help you write the actual story.
- Collect pictures and scan them into the computer.
- Write the story in Word.
- Storyboard the story for iMovie
- Narrate the story in iMovie, arranging words, pictures, and music into a heartfelt tale.
Newspaper Article
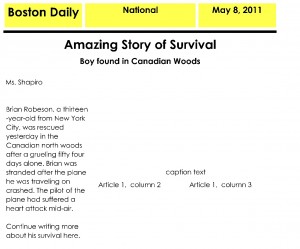
Today you will create a newspaper article which focuses on either the day of the tsunami (The Big Wave) or the day Brian was rescued (Hatchet.) First type in the article in Word and spellcheck and save. Use the template provided at the ReadWriteThink website to create the newspaper format. Copy and paste your article into the template.
Paul Revere Acrostic
Harris Burdick Stories
Letter to LTC Lee
You have written your friendly letter to LTC Lee. Today we will begin podcasting the letters in Garageband to place on our wikispace.
Letter To Our Penpals
Idiom Jeopardy Game
Animal Similes
Today you will type in your animal poems which are chock full of similes, using Word. We will learn how to change the orientation of your page, and place a border and picture on the document.
Into the Book
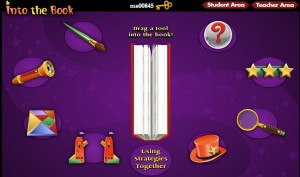
Today we will examine the reading strategy of visualization and create a mind movie for a story, complete with music. When you arrive at the website create a key and write it down. You will need this key to access your work next week. Drag the paintbrush to the book and listen to the explanation of visualization. Click on Try It Yourself and choose a story to visualize.
Writing Prompts
Today you will work on typing in your writing prompts into Word. After you do a spell check, change your font and add a picture.
Poetry Glog
Today you will create a Glog, at Glogster EDU, of the poem you chose to read and interpret . You can download a public domain image of the poet at Wikimedia Commons. Include the following information on the Glog:
- Name of Poet
- Country of Origin (i.e. American Poet, English Poet, etc.)
- Birth and Death
- Type poem if possible, if copyrighted still create a link to the poem
- Any unknown or tricky vocabulary and what it means
- Use of figurative language
- Interpretation of poem
Black History Magazine Cover
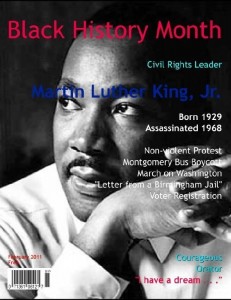
Today you will use Big Huge Labs to create a magazine cover of the famous African-American which you chose for your book report. Find a picture of the person on the Internet and download it into your documents folder. Then compile the information below on a magazine cover.
Name of Person
Caption to state why s/he is important
Date of birth and death (if applicable)
Two character traits
3 – 5 important events in life or reasons why s/he is important
Famous quote or something else you feel is important to include
Snow Poems
Today you will key your snow poem into Microsoft Word. Put a school heading on your page using the Header portion of Word, center a title, use the spelling and grammar check, and edit the font. You will create a snowflake at Make-A-Flake and insert it into your poem, as a picture behind the text.
Tall Tales
Today will type in your Tall Tale project. We will learn how to make columns so that you can create a long tall tale!
Picture A Word
Let’s make a word come alive! Choose a word and animate its meaning in Animation-ish. Click the word below to see its meaning.
My Dream For The World
Today you will key into Word your My Dream For The World paragraph. We will learn how to download a picture from the Microsoft Office website to include in your paragraph.
Snow Poems
Today you will key your snow poem into Microsoft Word. Put a school heading on your page using the Header portion of Word, center a title, use the spelling and grammar check, and edit the font. You will create a snowflake at Make-A-Flake and insert it into your poem, as a picture behind the text.
Idioms
Today you will create a two panel comic on your chosen idiom. On the first panel create the literal version of the idiom. On the second panel create a comic demonstrating what it actually means. Title your comic the actual idiom. Click on the comic below to go to the site. If you are finished early visit the sites below the comic.
Reading Comprehension Test
Today you will take the online Reading Comprehension test given by the state of Texas so that Mrs. Leary can see areas that might need improvement.
Homophone Voicethread
Make A Flake
Stream of Consciousness Poem
Grab your lasso and rope in your tessellation creation from last week. Copy and paste it into a Word document. Place a heading on the Header portion of your page, and then let your thoughts roll onto the page, developing a stream of consciousness poem about the tessellation.
Snow Poems
Today you will key your snow poem into Microsoft Word. Put a school heading on your page using the Header portion of Word, center a title, use the spelling and grammar check, and edit the font. You will create a snowflake at Make-A-Flake and insert it into your poem, as a picture behind the text.
Hero Voicethread
What is a hero? Today you will key in your paragraph describing your vision of a hero. You will also create an avatar to use in the class Voicethread. Take the content of your paragraph and turn it into a Wordle, which we will use on your page of the Voicethread. We will invite your high school Ordinary Heroes partners to comment on your Voicethread once it is complete.
Choose one of these sites to create your avatar.
Idioms
Today you will create a two panel comic on your chosen idiom. On the first panel create the literal version of the idiom. On the second panel create a comic demonstrating what it actually means. Title your comic the actual idiom. Click on the comic below to go to the site. If you are finished early visit the sites below the comic.
A Special Person in My Life
Today you will put your newly acquired keyboarding skills to work! I will introduce Microsoft Word so that you can publish your writing prompt about a special person in your life. You will learn how to use the Header, Alignment and Spacing, First Line Indent, Spelling and Grammar check, and how to format the font. Next week we will learn how to download and add a picture from the Microsoft website and print our finished work.
Family Traits Wordle
Mouse Practice, Math, and More
I am thankful for…..
Today you will type your I am thankful… paragraph into Stationary Studio. Choose one of the Thanksgiving designs for your work.
Letters to Afghanistan
Today you will use Word to key in your letter to Captain McCarthy. We will podcast this letter and place it on Our Soldier in Afghanistan wikisite.
Bio Poem
Today we will review some of the formatting features in Microsoft Word, so you can begin to key in your Bio Poem. We’ll review how to set up a heading, Alignment and Spacing, formatting text, and Spellcheck. You also learn how to use Photobooth to take a picture yourself, which can be placed in the poem.


