Poetry Anthology

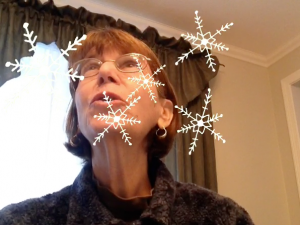
April is poetry month! You have been learning about the different types of poems and have written some, too. Let’s create an anthology using the iPads and Book Creator. Be creative on how you express yourself and choose elements to enhance the written word. Below is an example of a few different ways to enhance the poems using apps like DoInk, iMovie, Green Screen, My Flake, PicCollage and Drawing Pad.

Alliteration at the Zoo

After studying poetry and figures of speech, specifically alliteration, create an alliteration sentence about an animal you might find in the zoo. Visit the websites below to find a public domain pictures of your animal. Download the picture to the camera role. Next, use the app Yakit Kids to import your picture and then voice over your sentence. All the short movies will be combined into a class movie, Alliteration at the Zoo.

Wikimedia Commons
Pics4Learning
USA.gov

Snow Haikus

Let’s create a snowflake smashup. Today we will use the iPads to create and animate snowflakes swirling and falling using the app Do Ink. Next you will use the video camera on the iPad to film yourself reciting your haiku. Finally, we will combine the two videos into a movie using the app Green Screen. Click the picture below to watch my example.

snowfalling

Bio Poem

Today we will review some of the formatting features in Microsoft Word, so you can begin to key in your Bio Poem. We’ll review how to set up a heading, Alignment and Spacing, formatting text, and Spellcheck. You also learn how to use Photobooth to take a picture yourself, which can be placed in the poem.

Digital Poetry Anthology

Today you will use Powerpoint to compile the poetry which you have written this year into a digital anthology. Use one slide per poem, including the type of poetry it represents in the heading. Create a slide for the title page and an About The Author slide. Choose a background that goes well with each slide, and be creative with your presentation. Also, the slide show should advance on a click with the same transition between each slide. Record yourself reading the poem with the build in record sound feature in Powerpoint.

Poetry Anthology

Poetry Glog

Today you will create a Glog, at Glogster EDU, of the poem you chose to read and interpret . You can download a public domain image of the poet at Wikimedia Commons. Include the following information on the Glog:

  • Name of Poet
  • Country of Origin (i.e. American Poet, English Poet, etc.)
  • Birth and Death
  • Type poem if possible, if copyrighted still create a link to the poem
  • Any unknown or tricky vocabulary and what it means
  • Use of figurative language
  • Interpretation of poem

Bio Poem

Today we will review some of the formatting features in Microsoft Word, so you can begin to key in your Bio Poem. We’ll review how to set up a heading, Alignment and Spacing, formatting text, and Spellcheck. You also learn how to use Photobooth to take a picture yourself, which can be placed in the poem.

Poetry Glog

Today you will create a Glog, at Glogster EDU, of the poem you chose to read and interpret . You can download a public domain image of the poet at Wikimedia Commons. Include the following information on the Glog:

  • Name of Poet
  • Country of Origin (i.e. American Poet, English Poet, etc.)
  • Birth and Death
  • Type poem if possible, if copyrighted still create a link to the poem
  • Any unknown or tricky vocabulary and what it means
  • Use of figurative language
  • Interpretation of poem

Snow Poems

We will put your new keyboarding skills to work today by keying in your Snow Poem. Put a school heading on your page using the Header portion of Word, center a title, use the spelling and grammar check, and edit the font. You will create a snowflake at Make-A-Flake and insert it into your poem, as a picture behind the text.

Bio Poem

Today we will review some of the formatting features in Microsoft Word, so you can begin to key in your Bio Poem. We’ll review how to set up a heading, Alignment and Spacing, formatting text, and Spellcheck. You also learn how to use Photobooth to take a picture yourself, which can be placed in the poem.

If I Were In Charge of the World Voicethread

We will be creating a class Voicethread showcasing your If I Were In Charge of the World poems, based on the poem by Judith Viorst. Below are the steps for creating the final product.

1. Key in your poem into Microsoft Word. We will review some of the formatting and editing techniques. We will learn how to change fonts and sizes, use Alignment and Spacing, and Spelling and Grammar check.

2. Create an original work of art based upon your poem and scan it into the computer.

3. Create an avatar to use as an identity on My Avatar Editor.

4. Record your poem in Garageband and save it as an mp3 file.

Bio Poem

Today we will review some of the formatting features in Microsoft Word, so you can begin to key in your Bio Poem. We’ll review how to set up a heading, Alignment and Spacing, formatting text, and Spellcheck. You also learn how to use Photobooth to take a picture yourself, which can be placed in the poem.

Snow Poems

We will put your new keyboarding skills to work today by keying in your Snow Poem. Put a school heading on your page using the Header portion of Word, center a title, use the spelling and grammar check, and edit the font. You will create a snowflake at Make-A-Flake and insert it into your poem, as a picture behind the text.

Digital Poetry Anthology

Today you will use Powerpoint to compile the poetry which you have written this year into a digital anthology. Use one slide per poem, including the type of poetry it represents in the heading. Create a slide for the title page and an About The Author slide containing your picture. Choose a background that goes well with each slide, and be creative with your presentation. Also, the slide show should advance on a click with the same transition between each slide.

Acrostic Poem

Today you will create an acrostic poem about yourself, using strong adjectives, in Powerpoint. Choose a vertical Word Art for your name. Use a text box for the adjective. You and a partner will work on taking a picture of your profile in Photobooth. You will insert the picture into your Powerpoint slide and use the drawing tools to trace around your profile. Choose your favorite colors for the fill and drop a shadow on the object.

Figurative Language Minibook

We will use the drawing component of Appleworks to create a minibook of six types of figurative language: simile, metaphor, personification, alliteration, onomatopoeia, and hyperbole. Use one page for each. Give a definition, an example, and add a mini picture to the page. Create a colorful front cover with a title and your name.

Use the following website to help you complete your book.

Brainpop Similes and Metaphors

Figurative Language

Poetry As We See It

Paint by Idioms

Winter Poems

We will put your new keyboarding skills to work today by keying in your Winter Poem. First, we will learn how to put a school heading on your page using the Header portion of Word. You will learn how to center a title, use the spelling and grammar check, edit the font, and add a picture. You will create a snowflake at Make-A-Flake and insert it into your poem, behind the text.

Cinquain Poems

Today you will use PowerPoint to key in your cinquain poem. These poems will be used to create a class VoiceThread. Use a different Word Art style for each line of your poem, trying to match the form to your words. You may choose a very subtle background for your poem, one that does not distract from the Word Art style.  Finally, you will create an avatar to represent YOU on the VoiceThread!

If I Were In Charge Of The World Poem

Today you will key in your poem, If I Were In Charge Of The World, based on the poem by Judith Viorst. We will review some of the formatting and editing techniques in Microsoft Word. We will learn how to change fonts and sizes, use Alignment and Spacing, Spelling and Grammar check, Insert a Picture from a file, and use Borders. We will use Photobooth to take a picture of yourself for the project. You will save your document as World, and print to the lab printer.

Bio Poem 2

Today you will learn how to use Photobooth to take a picture of yourself and how to insert that picture into your Bio Poem. You also will learn how to place a border around the page of a Word document. Finally you will print the finished product for Open House.

Bio Poem

Today we will review some of the formatting and editing features of Microsoft Word so that you can type the Bio Poem. We will focus on formatting fonts and spelling and grammar check. Please go to the dock, click on the icon for Word, and click Open to create a blank document in Word.